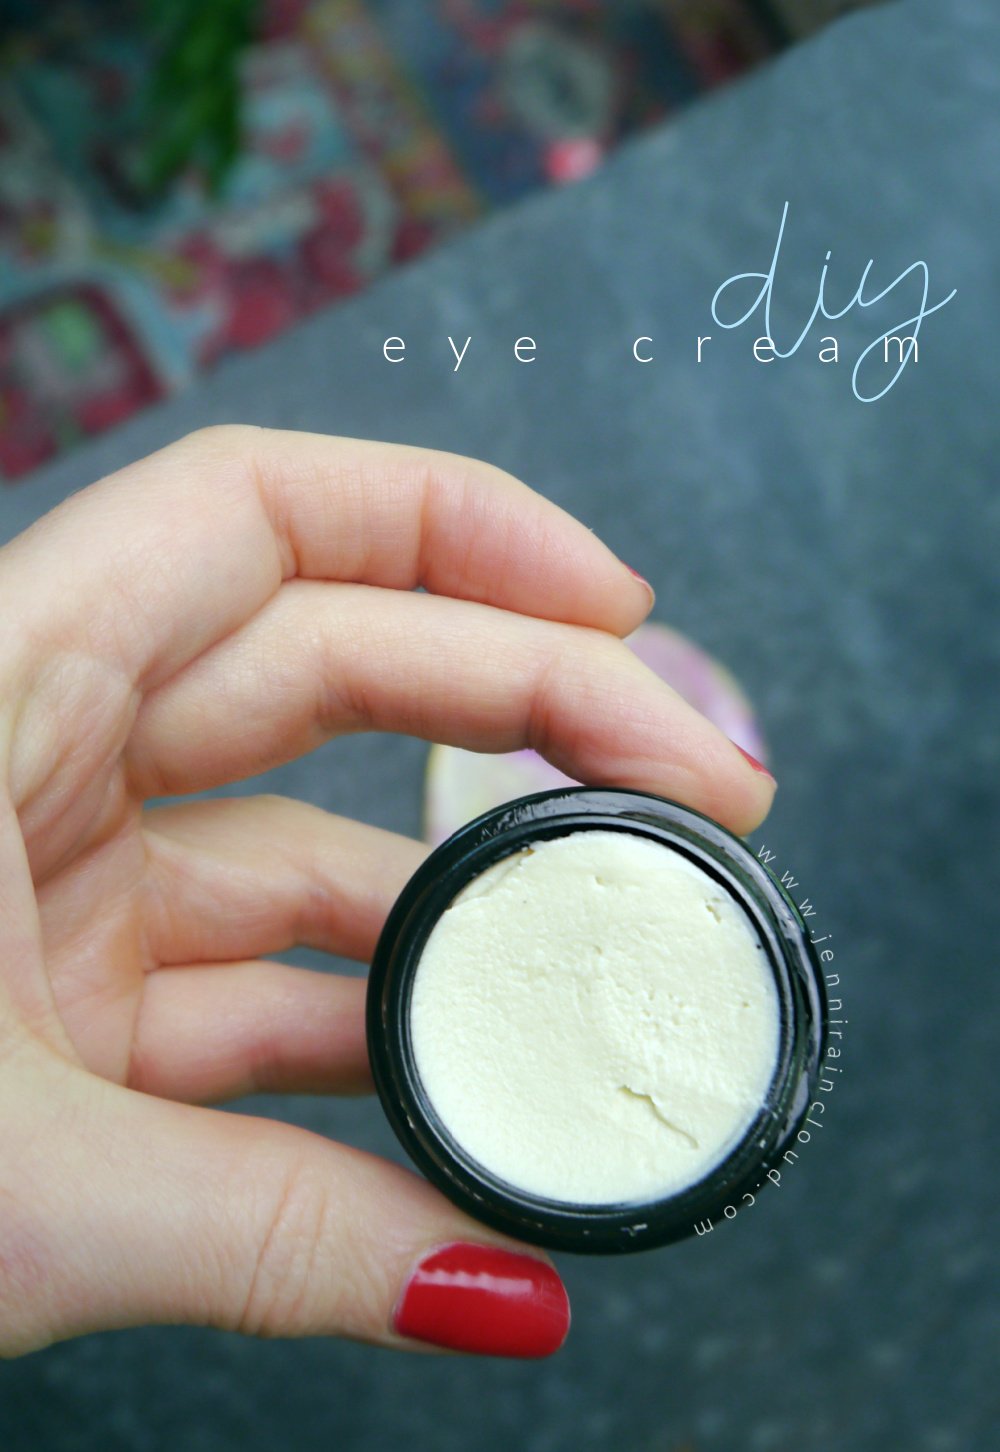
Making your own DIY Eye Cream is not only rewarding, it’s effective. I’ve chosen some potent anti aging ingredients that are going to help tighten the sensitive skin around the eyes, reduce the appearance of dark circles and puffy eyes and repair and rejuvenate skin cells. In this post, I will teach you how to make a fluffy, creamy eye cream that you’ll love to add to your skin care routine!
Disclosure: This post contains affiliate links, meaning, at no additional cost to you, I will earn a small commission if you click through and make a purchase. Learn more
There are so many good reason you should make this eye cream recipe. One, you could not go to a department store or spa and get this amazing of an eye treatment. It’s that good. Two, making lotion is so rewarding and fun. Three, there are so many crazy wrong ingredients in over the counter anti aging products.
I’ve made this exact DIY eye cream recipe several times because it is one of my favorite homemade beauty products to make. I’ve formulated it full of the best anti aging, natural ingredients to firm, smooth and nourish the delicate skin around your eyes!
I chose natural, simple ingredients that have substantial antioxidant properties that will fight age causing free radicals. I’ve also chosen specific carrier oils and an essential oil blend that will reduce the appearance of fine lines and improve the skin tone around the eyes.
Why Make Your Own DIY Eye Cream?
Many of us are guilty of splurging on an expensive eye cream in the hopes our once youthful eyes will return again. We all want less under-eye bags, less dark circles and less wrinkles. I get it-I’ve done it. However, I’m here to tell you that those conventional eye creams are full of water, unnatural emulsifiers, preservatives and artificial fragrances. These types of harsh chemicals are not ideal for the skin, especially the delicate under-eye area.
Personally, I’d like to take matters into my own hands and let nature do her thing. Using plant based ingredients is an effective natural solution and very likely the best eye cream you’ll ever use.

DIY Eye Cream Ingredients:
Rosehip Seed Oil penetrates deeply into the lower layers of the skin where it regenerates cells and increases collagen production. It is rich in vitamin C, Omega-3 and Omega-6 fatty acids and retinoic acid. Studies have shown rosehip oil brightens skin and fades dark circles! It has also been known to fade age spots and reduce the appearance of broken capillaries.
Green Tea contains caffeine. It is full of antioxidants and has anti inflammatory properties to help soothe and calm skin. Caffeine will actually tighten skin, too! I’m sure you’ve heard of cellulite treatments containing caffeine. That’s because caffeine is a diuretic. It will dehydrate fatty cells so that water will disappear from the surface of your skin. Caffeine is a vasodilator, which means it tightens skin. Green tea also helps regenerate and repair skin cells.
Carrot Seed essential oil contains a HUGE amount of age fighting antioxidants, vitamin C and Vitamin K. It has been found to enhance the body’s immune response to UV rays, which can decrease sun damage from UV exposure. My favorite benefit of carrot seed oil is that it is so healing and it rejuvenates skin cells. In fact, carrot seed has the ability to stimulate cell growth and repair damaged skin. It is a common ingredient in eye treatments.
Lavender essential oil is healing and moisturizing as well as anti fungal, antibacterial and antiseptic! Why I add it in this cream is for the smell. It has a fresh smell that cuts the scent of carrot!
Sweet almond oil is full of vitamins D, E, B1, B2 and B6, calcium, potassium, and magnesium. Almond Oil is light and absorbs easily. Using a few drops of almond oil daily can greatly reduce dark under eye circles under the eyes. It is helpful at nourishing dehydrated skin. Almond Oil is said to be the closest to the oil found in a babies skin!
Vitamin E helps fight wrinkles and has a firming effect on the skin. An added bonus with adding vitamin E is that it helps prolong the shelf life of any product you add it to.

More Anti Aging DIYs You Might Like:
- coQ10 Seabuckthorn Facial Oil
- Squalane Serum
- Dry Skin Mask
- Pink Rose Cleansing Balm
- Lip Line Eraser Roll On
What You Need To Make DIY Eye Cream:
- 2 Glass Bowls (Pyrex measuring cups work best)
- 2 Medium Pots
- Thermometer (find it HERE)
- Immersion Blender (find it HERE)
- Measuring Spoons
- Measuring Cups
- Glass Containers (jars or pump bottles)
- 1/4 cup Green Tea (find it HERE)
- 1/8 tsp. NeoDefend (find it HERE)
- 1 tbsp. Rosehip Seed Oil (find it HERE)
- 1 tbsp. Sweet Almond Oil (find it HERE)
- 1/4 tsp. Vitamin E (find it HERE)
- 1 tsp. Emulsifying Wax (find it HERE)
- 1 drop Carrot Seed Essential Oil (find it HERE)
- 3 drop Lavender Essential Oil (find it HERE)
I have created a much more in-depth tutorial on lotion making if you need more directions.

DIY Eye Cream
Making your own DIY Eye Cream is not only rewarding, it's effective. I've chosen some potent anti aging ingredients that are going to help tighten the sensitive skin around the eyes, reduce the appearance of dark circles and puffy eyes and repair and rejuvenate skin cells. In this post, I will teach you how to make a fluffy, creamy eye cream that you'll love to add to your skin care routine!
Materials
- 1/4 cup Green Tea
- 1/8 tsp. NeoDefend
- 1 tbsp. Rosehip Seed Oil
- 1 tbsp. Sweet Almond Oil
- 1/4 tsp. Vitamin E
- 1 tsp. Emulsifying Wax
- 1 drop Carrot Seed Essential Oil
- 3 drop Lavender Essential Oil
Tools
- 2 Glass Bowls or Pyrex Measuring Cups (2-4 cup)
- 2 Medium Sized Pots
- Thermometer
- Immersion Mixer
- Measuring Cups
- Measuring Spoons
- Glass Containers (jars or pump bottles)
Instructions
- Brew a cup of green tea.
- Fill two medium sauce pans about half way full of water.
- Place a glass bowl with a spout in each pot and turn on stove to medium heat.
- Add wax, rosehip seed oil, vitamin E oil and sweet almond oil to one pot.
- Add green tea and NeoDefend to the other pot.
- Heat both mixtures until the emulsifying wax has totally melted.
- Check temperatures of both pots with a thermometer. **BOTH mixtures must be the same temp before you combine them or your cream won’t set.**
- When both your oil mixture and water mixture reach around 130 degrees, pour your water mixture into your oil mixture.
- Use a hand held blender and mix your cream.
- Continue to mix periodically (every 10 minutes or so) until you notice that water is no longer separating on the bottom. This tends to take about 30 minutes to an hour.
- Once fully mixed, add essential oils then pour into containers.

Notes
- This recipe makes 4 ounces. This cream is light and can be used morning and night. It works great under make up.
- I recommend buying 2 2 ounce glass jars and storing one jar in the fridge until you're ready to use it. This will keep your cream fresher longer.
- If you have a skincare fridge, this under-eye cream would be even more effective applying it cold to reduce even more eye puffiness.
Ingredient Notes:
I get most of my ingredients from Mountain Rose Herbs. Their quality is unbeatable. If you use another brand of emulsifying wax, I can not guarantee that my recipe will work as well.
I get my essential oils from Plant Therapy and Mountain Rose Herbs. They are both fantastic.
I find most of my bottles from Specialty Bottle or Amazon. Below or some fun containers you might like.
- Find 2 ounce glass jars HERE.
- Find a 4 ounce glass jar HERE.
- Find 2 ounce treatment pump bottles HERE.
Making creams can be tricky, but they are so worth it! Plus, you’ll have the peace of mind knowing that every ingredient in your finished product you chose and you know about. Beauty companies do not have to disclose every single ingredient on their labels.
This DIY eye cream is rich and fluffy and will absorb quickly and penetrate into the deeper levels of your skin delivering much needed nutrition for healthy skin.
Taking care of the delicate skin around the eye is vital in fighting the appearance of wrinkles and fading lines that have already appeared.
Always be very gentle around your eyes. Dab a small amount of cream around the eye being careful not to push or pull on the skin. Feel free to apply this cream where you need it most.
I don’t sell creams in my Etsy shop but I do offer my Anti Wrinkle Eye Stick Roll On that contains some of these ingredients and then some. It is an incredible product and since it does not contain water, it is POTENT. Shop it HERE.
xx, Jenni
P.S. This recipe is the same firming eye cream recipe it’s always been-I like to remake my recipes and update pictures from time to time.
PIN IT!!


Jennifer Phillips worked as a licensed aesthetician for over 8 years before creating the DIY skincare blog, Jenni Raincloud and her natural skin care line, J. Raincloud Organics. Jennifer has been blogging full time for 16 years and loves to gain and share knowledge on how to achieve beautiful skin the natural way.

Hi Jenni – would love to try this too – my last order was out of this world awesome – you are a dear to let me try it.
Let me know when you have this available to purchase on etsy.com
Marci
Out of curiosity, would any of these firming creams work as a good breast firming/lifting cream? Do you have a recipe for one if not? I love homemade goodies but my girls need some loving too!
Kristin-that is a great thought! I would give it a go-you could also add Cypress Essential oil because it helps firm as well. Caffeine is more of an instant gratification thing but your idea is definitely worth a try!
THANK YOU Kristin for asking & of course Jenni for answering! While I know this post was a few years ago, I have been making my own skin care products (mostly facial), but have wanted explore what might help the breasts mostly in texture, appearance & who wouldn’t want firming too right!!?? Lol
I have read oils are good for the breasts, and an added benefit for monthly self checks because things are easier to feel. However, my question is:
what would be the most beneficial blend to use for firming & tightening? I know what to do internally, as well as balance and exercise. I’ll take as many suggestions as I can! LOVE LOVE LOVE your blog!
Angela Elise
I love the idea of making my own cream! I have never used anti-aging products before for fear of what would happen when I stopped using them. I figure the wrinkles would come back rapidly (& maybe even more wrinkles than before) since anti-aging products falsely “healed” them. Whether that is true or not, would this cream require continual use or would I be able to stop using it after a while without any reversal of what the cream accomplished? I’m not even sure if this makes sense! I have this same question for your brow thickening serum & the lash lengthening serum. Thanks for any info on this!
Arti-Hi! Because there are no artificial ingredients or chemicals in my recipes, you don’t have to worry. Caffeine works short term-it will tighten once it’s applied but it is not going to give you long term results. Long term results come from regular exfoliation and nourishing. Keeping skin happy and hydrated goes a LONG way in combating wrinkles.
The brow and lash serum work because they are nourishing the lashes and revving up circulation. You don’t have to worry about any reversal or hair falling out-everything in those serums, your hairs will love!
I really love this recipe! I was wondering if you could put this in your etsy shop for sale. I am a new mom and do not have time to make it but my face desperately needs it. Thank you!
Hi Angie-I have gotten a lot of requests for this so I for sure am! I am waiting on the jars to put them in, once I have those I will post them on Etsy! Thanks!!
Can’t wait for that one!
Can’t wait to try the firming eye cream. Please let us know when available Jenni……Marci
Hi Marci-Just listed the firming eye cream on Etsy and I only have 1 left! I will be making a new batch in the next couple of days but if you want me to hold this one for you I would be happy to! https://www.etsy.com/listing/183987768/firming-eye-cream?ref=shop_home_active_2
That would be great – thanks Jenni for thinking of me. How can I order it?
Hi Jenni – looks like I missed it – please tell me again how to make a custom order so I can place an order for your next batch.
thanks….Marci
Marci-I’m making a new batch asap. I’ll let you know when it’s posted!
Thanks Jenni – I’m looking forward to it. Please give me a heads up the before you plan on listing it if you can so I will know to be on the lookout for it.
Thanks again…..Marci
Hi Jenni, I have been trying the link to the firming eye cream, and I cant get through.. Any way you can you send me the recipe?? I read it yesterday, and bought most of the ingredients, was hoping to try a batch soon.. I cant wait! Looks AWESOME! I used to use dermalogica as well, loved it, but I started doing research on the actual ingredients, and was super bummed..parabens are b.a.d.!
Wendy-I had a hard time getting to Primally Inspired’s sight yesterday-Here is the recipe-
1/4 cup green tea (find it HERE)
1/4 tsp. citric acid (find it HERE)
1 tbsp. rosehip seed oil (find it HERE)
1 tbsp. sweet almond oil (find it HERE)
1/4 tsp. vitamin E (find it HERE)
1 tsp. emulsifying wax (find it HERE)
1 drop carrot Seed essential Oil (find it HERE)
3 drop lavender Essential Oil (find it HERE)
1. Brew a cup of green tea.
2. Fill two medium sauce pans about half way full of water.
3. Place a glass bowl with a spout in each pot and turn on stove to medium heat.
4. Add wax, rosehip seed oil, vitamin E oil and sweet almond oil to one pot.
5. Add green tea and citric acid to the other pot.
6. Heat both mixtures until the emulsifying wax has totally melted.
7. Check temperatures of both pots with a thermometer. (like this ONE)
**BOTH mixtures must be the same temp before you combine them or your cream won’t set.**
8. When both your oil mixture and water mixture reach around 130 degrees, pour your water mixture into your oil mixture.
9. Use a hand held blender (like this ONE) and mix your cream.
10. Continue to mix periodically (every 10 minutes or so) until you notice that water is no longer separating on the bottom. This tends to take about 30 minutes to an hour.
11. Once fully mixed, add essential oils then pour into containers.
When I try to ( Find It Here ) nothing
Hi Gina-I just corrected the post. I made a limited batch and sold it in my Etsy shop. I found that I prefer selling my Anti Wrinkle Eye Stick-find it HERE because it is more potent and pure. I still love this recipe because sometimes you just want a light cream that soaks in quickly but I just won’t be selling it. So sorry!
Hi Jenni- are you using citric acid or neodefend for preservatives?
Please
Una
Author
Undrakh-I’m using neodefend for the preservative.
Hi Jenni,
I was looking on the Mountain Rose Herb website to gather my ingredients to make this recipe. The emulsifying wax is not considered “a benign and natural additive because of its heavily manufactured nature and alcohol content”. Is this safe to use? Especially around the eye area? What about using Cree Bellini wax? Or something else? Any help would be greatly appreciated!!
Thanks, Laura
Sorry. Should say cera bellina wax. Very annoying when the computer decides to spell for you!
Laura-I dislike using emulsifying wax. It is highly processed and has no benefits for the skin. The problem is, if you want a cream, it’s necessary. No other “emulsifiers” I’ve found bind oil and water without leaving you with a huge mess. I use as little as possible and often get complaints that my recipes are too thin and watery but I wanted to provide a recipe for people that just prefer a cream. The best option is to create a serum for your eyes with no water. It won’t penetrate as well but it is very pure. If you want to do that, just omit the water, wax and citric acid. I have never heard of cera bellina wax-I will be checking it out though! Thanks!!
Hello to every one, it’s really a pleasant for me to
visit this website, it includes important Information.
What is the benefit of the citric acid? Thanks!
I have all the ingredients except the Citric Acid. Is this essential? What properties does it have? Thanks.
Diane-The citric acid lowers the pH. It allows this cream not to have a preservative because the lower the pH, the less bacteria grows. If you omit it, your cream will be fine but the shelf life will be much less-like possibly only a week.
Got it. Makes sense. What is the self life with the Citric Acid? Should I use this in all DIY creams?
It’s really hard to say. Bacteria and Fungus growth depends on how sterile the process of making the cream was and the amount of essential oils you use. Plus testing your pH will give you some insight too. A pH of 3 will inhibit quite a bit, where as a pH of 6 you have more chance of bacteria growth. I have written more about this HERE. I have included citric acid in all my cream recipes on this blog. If you aren’t using a strong preservative (which I don’t condone!) then you need to use a pH adjuster.
I have recently tested my products and am finding very low bacteria levels on a cream that is about 2 mos. old with no preservative, just citric acid. Hope this helps-preserving creams is a very complicated issue!
All great info to know! Thanks so much!
Hi! thanks for this wonderful recipe. I was wondering if I could use Aloe in this particular recipe,,and if so, about how much?
my eye area is so sensitive and I’m pretty sure the aloe may be more soothing for me
Beth-You could-I would use it in place of the water! You want to keep the same amount of water in the recipe so you could do 1/2 aloe and 1/2 water as well!
Hi Jenni,
I’m interested in making this cream, but I have a nut allergy. What would be the next best thing to Sweet Almond Oil?
Cheri-You could use Evening Primrose, Meadowfoam Seed, Apricot Seed, Pomegranate Seed or even Olive Oil.
Hi Jenni,
I just found your recipes and have some questions. It says not to use neodefend with l-ascorbic acid. I like using vit. So will this cause a problem if I use a vit c in another product with a product with neodefend in it? Also do you ever use argan or baobab oil in your recipes?
Tracey-I hadn’t heard of that-I’ll look into it cause I like to add the L.Ascorbic acid to my lotion that contains neodefend! Where did you find this info.? I have a tiny bottle of argan that I plan to use soon but I have not worked with baobab oil yet!
If I put this in an airless pump bottle, will that help with shelf life?
Thank you
Karen-It will!
When I click on “one like this” on the thermometer, it goes to the blender. When I click on the one that is for the blender, it also goes to the blender. So….which type of thermometer?
Author
Debbie-Thank you for pointing that out! I’ll get that fixed! I use a thermometer like THIS.
That was wonderful blog post and loved the tips for making eye cream with ease and it will be of great benefit for skin care and thanks a lot for sharing
Good Afternoon,
Could I sub the Neodefend preservative with Optiphen preservative?
Thank you kindly
Tamecca
Author
Tamecca-I believe so. I’ve never worked with optiphen but I believe it is very similar to neodefend.