A DIY cleansing balm is one of the most effective ways you can detox your skin without stripping it of it’s much needed natural oils. Using a cleansing balm can also protect the pH of the skin and deliver extra nourishing hydration. When adding a clay in your cleansing balm recipe, you not only encourage pore detox, you also add a grit that will gently exfoliate the skin. This is a simple recipe that I think will become a staple in your beauty routine!

I really do love the oil cleansing method. So much so that I feel like a broken record! It has been a very successful method of detoxing my skin as well as keeping my skin from getting too dry. If you haven’t tried it, I highly recommend you give it a go. In my experience, very few people end up finding it doesn’t work for their skin. I hear more often then not that it has been the number 1 game changer in people’s skin care routines.
I decided it was time to formulate a new DIY oil cleanser. I’ve had great feedback and great personal results on my oil cleanser recipes that contain clay so this oil cleanser has 2 types of very gentle clay as well as a couple new oils I’ve been experimenting with and enjoying.
It is a great oil cleanser for those of you with dry skin that might still experience congestion here and there. I find that incorporating a clay in to my skin care routine has helped smooth my skin out without causing me to become dry.
DIY Cleansing Balm Ingredients
Sacha Inchi oil is 93% fatty acids (omegas 3, 6 and 9). That’s crazy! Especially when you compare it to coconut oil which is only 10%! Because it is high in linoleic acid, it is an excellent oil for people with acne. This oil will also help balance too much oil production. You can read more HERE about why oils high in linoleic acid help clogged skin.
Marula oil is uniquely high in omega-9 fatty acid and that means it sinks much deeper into the skin than other oils. The result is more intense, longer-lasting moisture. A 2002 study found that marula oil enhanced penetration more than synthetic penetration enhancers! Another neat fact is that it is a highly stable oil so you don’t need to worry about it going bad for quite sometime. In fact, it’s 10x more stable than olive oil. It also is vitamin C rich as well as E.
Castor Oil is a cleansing oil and helps to remove dirt and makeup from the pores.
White Cosmetic Clay, also known as kaolin clay is the mildest of all clays and is suitable for people with sensitive skin. It helps stimulate circulation to the skin while gently exfoliating and cleansing it. It does not draw oils from the skin, so it can be used on dry skin types without negative results.
French Pink Clay, also known as rose clay is very similar to white cosmetic clay and was used to simply add the pretty color-lol! It’s totally optional. It does has some lovely benefits for the skin and adding clay into a cleansing balm boosts the detox power as well as gives the balm a texture that will help gently exfoliate the skin.
DIY Cleansing Balm Recipe
- 2 TBSP Sacha Inchi Oil (find it HERE)
- 1 TBSP. Marula Oil (find it HERE)
- 1 TBSP Castor Oil (find it HERE)
- 1 TBSP. Beeswax (find it HERE)
- 1 TBSP. White Clay (find it HERE)
- 1/4 tsp. French Pink Clay (find it HERE) optional
- 10 drops Rose Absolute (find it HERE) optional
- 3 drops Ylang Ylang (find it HERE) optional
Directions:
- Fill a medium sized pot half way full with water and place on the stove top at medium heat.
- Place a glass Pyrex measuring cup in the water.
- Add all the ingredients except the essential oils into the glass cup.
- Allow to thoroughly melt and stir in order to incorporate the clay.
- Remove from heat and add the essential oils.
- Pour into a container.
To Use:
- Scoop a quarter sized amount on to your fingertips and massage into the skin.
- Massage for 30 seconds-1 minute.
- Remove with a hot washcloth.
- Repeat the hot wash cloth for extra cleansing and detox.
- Follow up with a toner and moisturizer.
For more details on how to incorporate the oil cleansing method go HERE and HERE.
You may use this balm to remove eye makeup and it actually doubles as a mask! Just spread on a layer, let it set for 10-20 minutes then remove with a warm wash cloth! I often use my DIY cleansing balms as masks when I need extra detox and nourishment!
If you are looking for another gentle, anti aging clay that is good for dry skin, Rhassoul Clay is an amazing option as well.
Ylang Ylang is a great universal oil for any skin types but I chose it because it smells so good with the rose absolute. It is awesome for balancing the skin and can be found in my Spot Treatment Roll On recipe.
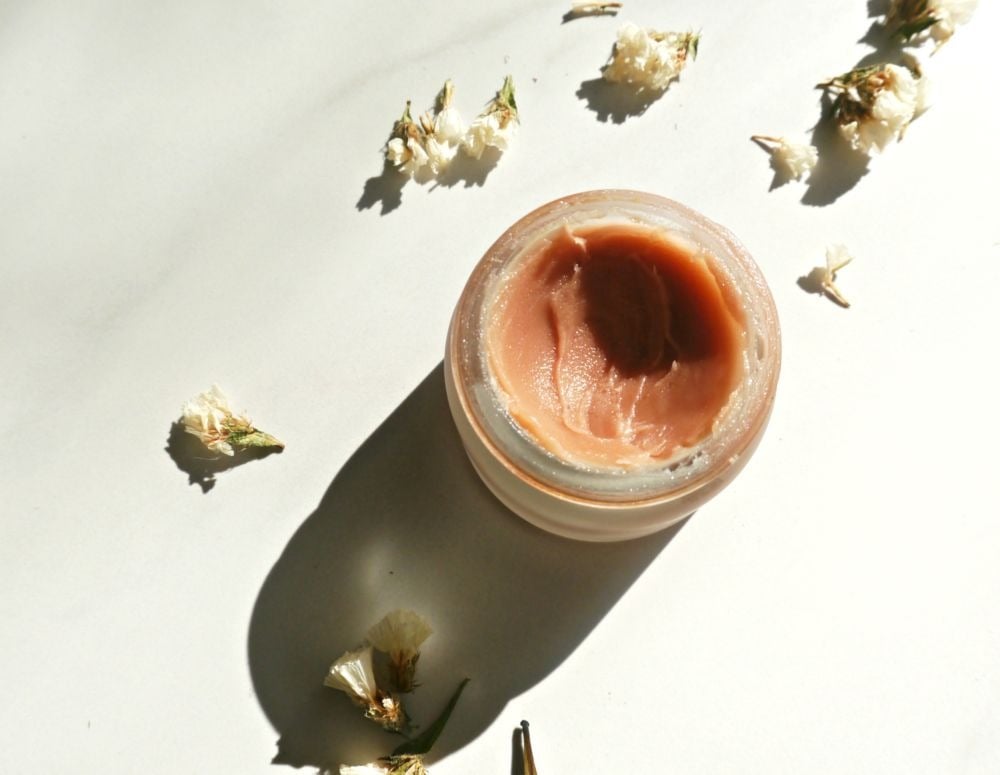
I’ve been using this DIY oil cleanser and am already at the bottom of my jar. I will definitely make it again because I love it! I find my skin looks best when I oil cleanse. I typically oil cleanse only at night. I loved the texture, color and smell of this product. I followed up with my rose hydrating toner and my new favorite face oil.
Mountain Rose Herbs is where I prefer to get all my DIY beauty ingredients and am very satisfied with their essential oils. Remember, your DIY beauty products are only as good as the quality of ingredients you choose. It may seem that DIY skin care is expensive up front but I use the same oils/essential oils over and over and make a large variety of different products just from a few ingredients!
xx, Jenni
PIN IT!!!


Jennifer Phillips worked as a licensed aesthetician for over 8 years before creating the DIY skincare blog, Jenni Raincloud and her natural skin care line, J. Raincloud Organics. Jennifer has been blogging full time for 16 years and loves to gain and share knowledge on how to achieve beautiful skin the natural way.

I’m surprised that you’re not getting your Rose Absolute from Mountain Rose Herbs as well.
https://www.mountainroseherbs.com/products/rose-absolute/profile
Author
Laura-I just wanted a rose scent and was not in the market to spend $60 on a tiny bottle and I figured a lot of people wouldn’t want to either unless we were using it for it’s skin benefits. Ideally, this would be better and of course best would be rose essential oil.
I don’t see the directions. Did I miss something? Recipe sounds wonderful. Thanks.
Author
Debra-Oh my gosh-I didn’t add directions. How silly! I’ll add them now! Thanks for letting me know! For convenience, I’ll add them here for you.
Fill a medium sized pot half way full with water and place on the stove top at medium heat.
Place a glass Pyrex measuring cup in the water.
Add all the ingredients except the essential oils into the glass cup.
Allow to thoroughly melt and stir in order to incorporate the clay.
Remove from heat and add the essential oils.
Pour into a container.
Hope this helps!
I’ve noticed that my skin seems to be drier the older I get, so I would definitely like to make this and give it a try. I read your other oil cleansing posts, but since I’ve never used the oil cleansing method before, I do have some questions. You don’t actually rub your face with the washcloth, correct? You rub the cleansing oils into your skin, steam your face, and repeat. Then you follow that up with a toner and moisturizing oil. Am I understanding that correctly? Does this cleanser remove your makeup, or do you use a makeup remover first? Sorry for all the questions, but I want to give this a try!
Author
Meagan-I only rub my face with the cloth in order to remove the oil. You massage cleansing oils in to the skin, remove with a hot towel and repeat. It’s makes more sense once you get going. And yes, I follow up with a toner and moisturizing each time! The cleansing oil removes makeup beautifully and it’s so gentle! Good luck and keep me posted!
Author
Meagan-I meant to say that you only repeat the hot wash cloth-you don’t apply more cleanser for a second time. I’ve updated the post with more detailed information if you need it! Sorry for the confusion!
I have been using this for 2 weeks now. Super easy to make, thought I did have a rough time getting the white clay to blend at first. First couple of days were rough because the clay brought out all kinds of zits–GACK. But now….love it! Made such a difference! Thanks to this, I’m getting closer and closer to my desire for an almost bare face make-up routine. 🙂
Author
ZooMama-Yay! I totally agree-I love this cleansing cream-it might be my favorite! Thanks for letting me know!!
I am addicted to this cleansing balm. I have made two batches so far. I love the way my skin looks and feels not just after using it in the evening, but also how nourished my face looks when I wake up. I made a batch for my sister ( we are both in our fifties), and she says it is the only thing she has ever used that truly made her skin feel moisturized. She asked if she could just leave it on and never wash it off. Haha. In my second batch I did add a tablespoon of mango butter (because I had it and wanted to use it up). It also came out great and creamy. I hope that was not the wrong thing to do :).
Author
Kristin-I’m so glad! I love it too! No problem using the mango butter. It’s a great addition! My only issue with butters is that they can become grainy in a balm but you can remedy this by reheating and then cooling it off as fast as possible by putting it in the fridge. If graininess ever happens. Thank you for telling me how much you and your sister like this recipe!
Hi Jenni,
I am thinking of adding an emulsifier eg cream maker so that I can wash the cleanser off instead of using the hot wash cloth. This is especially convenient in the mornings.
Your thoughts on this please.
Rgds,
Rozana
Author
Rozana-Sounds very interest. I’ve never gone this route so I can’t say much. I’m not sure the emulsifying cream maker will rinse much better but it’s worth a try. Keep me posted!
Is there anything you would recommend as a replacement for the beeswax? Unfortunately I have a contact allergy but would love to try this!
Author
Carthey-Yes, you can use candelila wax or carnauba wax. Both are vegan options and work similar to beeswax. They do tend to make your balm a bit harder than beeswax so I would add a bit less. I wrote a post on vegan waxes HERE!