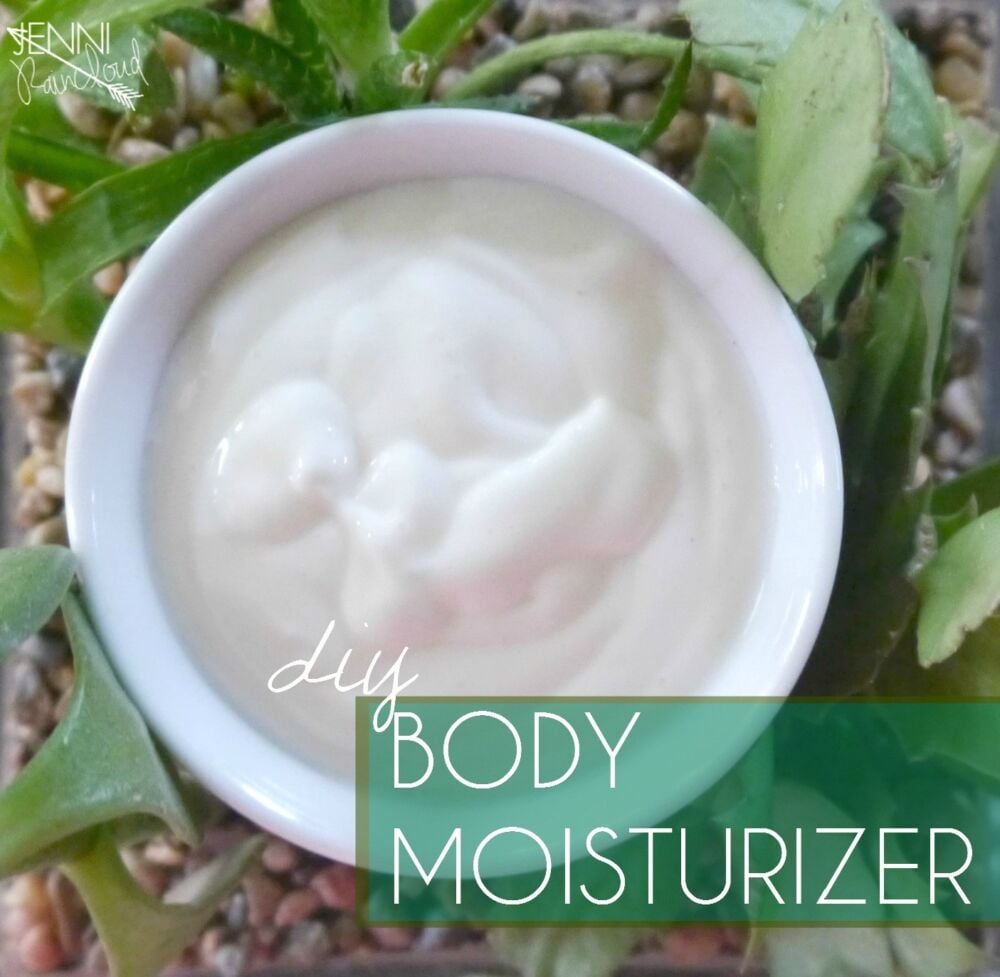
With winter in full swing an intense body moisturizer is a staple. Making it at home is so gratifying. You can be sure there are NO harmful chemicals. This DIY Body Cream recipe is full of moisture rich ingredients that will not only replenish but will also heal severely dry skin. This is a fun recipe that is full of hugely nourishing ingredients that will quench the thirstiest of skin! Moisturized skin looks younger and healthier so let’s make this-we need it!!
Shea Butter is a rich emollient that encourages the skin to produce collagen. Collagen gives the skin a fresh radiant look. Coconut Oil is extremely healing as well as moisturizing. Macadamia Nut oil is an excellent oil for dry and aged skin. It is also very calming. Vitamin E oil helps prolong the shelf life of your cream as well as nourishing and tightening the skin. Each of these ingredients come together to “feed” your skin! Your body will drink it up!
Distilled water must be used in order to keep your cream fresh longer. I have included a preservative with this recipe. NeoDefend is considered certified organic and non-GMO. It is antioxidant and very gentle to the skin. Those of you weary of using a preservative must remember that it only makes up .75-1% of your product. You can read more about and purchase NeoDefend HERE. Your cream should always be stored in glass bottles preferably dark glass. This will also keep your cream bacteria free longer. Any container that allows you to pump out your lotion is a good idea-this keeps you from depositing bacteria from your hands into your lotion.
DIY Creamy Body Cream
- 2 TBSP. Shea Butter (buy it HERE)
- 2 TBSP. Coconut Oil (buy it HERE)
- 2 TBSP. Macadamia Nut Oil (buy it HERE)
- 2 TBSP. Emulsifying Wax (buy it HERE)
- 1 tsp. Vitamin E oil (buy it HERE)
- 1 cup Distilled water
- 1/2 tsp. NeoDefend (buy it HERE)
- 30 drops Lavender Essential Oil (buy it HERE)
Directions:
- Fill a medium sized pot half way full with water.
- In a glass pyrex measuring cup, add distilled water and neodefend and place the cup in the pot.
- Start heating your “water mixure” on medium heat.
- In a second pot filled half way full with water, place another glass pyrex measuring cup and add your “oil mixture” (Combine shea butter, coconut oil, macadamia nut oil and emulsifying wax).
- Start to heat mixture on low-medium heat.
- **The key here is to heat both bowls until your ingredients are melted and both bowls are the same temperature-this should be around 160 degrees.**
- Once you hit the right temperature, pour your water mixture into your oil/butter/wax mixture.
- Take a hand blender and mix your water/oil mixture for about 40 seconds to 1 minute. Let stand for 15 minutes then mix for about 30 seconds again. Once you notice that the water isn’t separating at the bottom of your bowl after not mixing for a few minutes, you are done mixing.
- Once your mixture is no longer hot, add your essential oils then pour into containers.
- Let containers set for 24 hours. Your cream will thicken in this time.

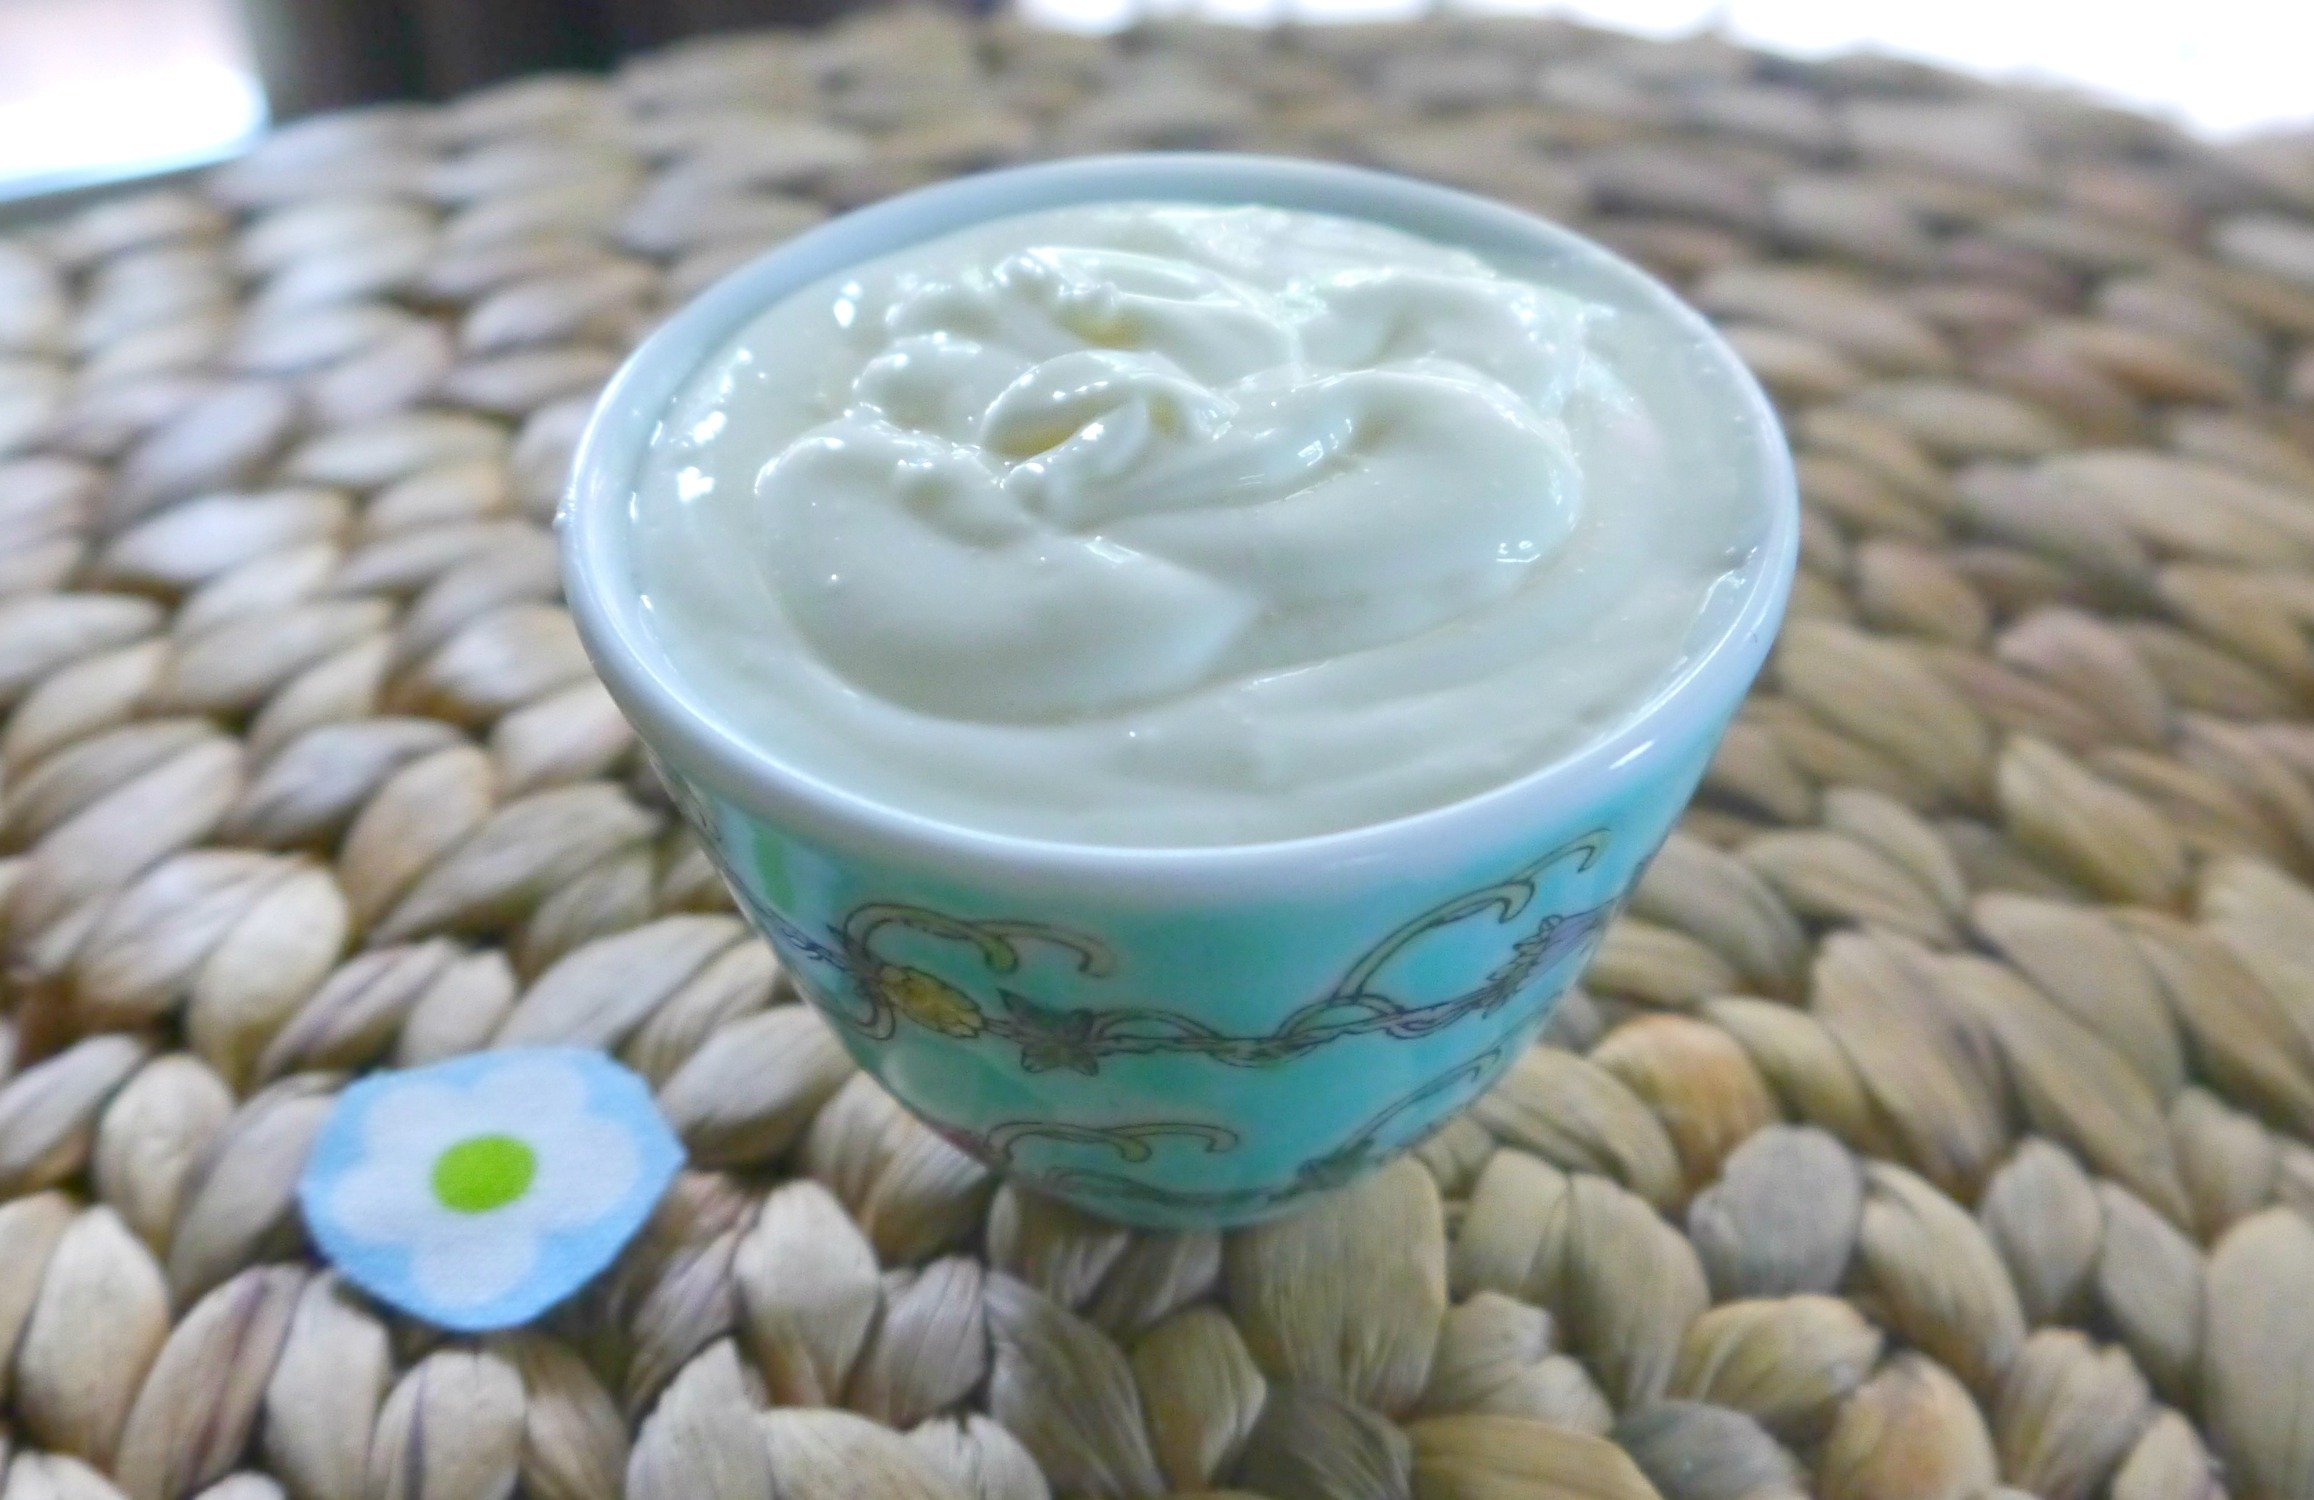
This recipe makes about 12 ounces. It can take up to 48 hours for the cream to thicken up. Do not speed the cooling process by putting it in the fridge!
It may seem daunting to make a DIY body cream. Salves and balms are much easier but once you get the hang of the extra step of adding the water you will realize it’s not hard and it’s so worth it! I love using a cream rather than a balm because creams soak into the skin quickly. I can slather it on and put my clothes on immediately without feeling greasy!
Remember to always use quality ingredients-this makes a huge difference in the way your cream feels and works. I have linked the products that I always use when making DIY skin care. I can not ensure success in your creation if you aren’t using the ingredients I am familiar with. You can do this-and you will be so happy you did!!
Leave me a comment below if you have any questions!
xx, Jenni
PIN IT!!!

Jennifer Phillips worked as a licensed aesthetician for over 8 years before creating the DIY skincare blog, Jenni Raincloud and her natural skin care line, J. Raincloud Organics. Jennifer has been blogging full time for 16 years and loves to gain and share knowledge on how to achieve beautiful skin the natural way.

Jenni, this sounds AMAZING!! I can’t wait to gather up all the ingredients and make it. I prefer a lotion to a balm or butter too and haven’t found the “right” recipe.
Thanks! I hope this works well for you!
I’ve ordered ingredients and am waiting for them. But I was just wondering. Would it be okay to use a stick blender instead of shaking the product?
Hi Shirley! You can absolutely use a stick blender-it works great for really getting the water and oil mixture mixed. I do the shaking method to save time and clean up. Thanks!!
I didn’t notice anything about shaking the mixture, where is that at?
Nikky-I’m not sure what you mean? I prefer to us a hand blender to mix the oil and water mixtures. I find it just works so much better then shaking. Plus, when the mixture is so hot, it tends to loosen the cap on the jar lid and leak.
Making this today for a few gift baskets! I hope I put the vit E oil in at the right time though, it looks like that step wasn’t written. Thank you for sharing your awesome recipes!
Rhanda, gift baskets sound wonderful! I will correct that on my recipe-Vitamin E can go in when you put the essential oils in at the end or you can add it to the mix while on the stove top. Either way it will work! Thanks!
I made this twice today and both times the lotion part just floated in the water/citric acid mix……I shook like crazy and I had my thermometer handy as well ensuring they were both at the same temp. Once I poured out all the water in the jar, the mixture felt nice, but I feel like I may have poured the essential oils down the drain! And I used ylang ylang the second time. Any idea what went wrong???
How frustrating! I’m sorry! The only thing I can think of is that when I combine my water mixture into my oil mixture the temps have to be very close to the same. Like around 130 or so. Also, lately instead of shaking, I have used my hand blender. Whether I’m shaking or blending, I keep blending or shaking periodically for about 30 minutes to an hour. I find that the water will continue to separate for most of that time, but then all the sudden it will be thick enough to combine. I don’t know if I mention this but you can always add your essential oils last. Sometimes I even add them to each individual container I fill up the day after. It doesn’t matter when you add them-you just want to avoid any heat. Good luck!
I am in the process of changing all facial lotions, cleansers, toner, etc. Do you have a daily/nightly regime that you follow? Also, how often should you use a mask? thanks for all your information and all natural recipes
Hi Melanie! I cleanse, tone, and usually use just a serum at night. Once the serum soaks in I use my dry skin stick on my cheeks and my eye stick under my eyes and between my brows. I am planning on starting the Oil Cleansing Method soon-I will do that at night.
I mask once a week. If I do a clay mask sometimes I will need to replenish my skin and I will whip up my avocado mask or just an aloe vera gel with some essential oils-I let it set about 30 minutes-the clay mask stays on only for 10 but it strips my skin of moisture. I need it for detoxing though! Hope this helps!! Good luck!
Wonderful!! Can’t wait to get started. Thank you
Melanie
I have been using this oil-cleanse wash since March 2013 and LOVE it. I use it at night. https://campwander.com/2013/09/coconut-oil-cleanse-with-essential-oils/
And this is my morning face wash:
Homemade Honey Cleanser
3 Tablespoons honey
1/2 cup vegetable glycerine
3 Tablespoons liquid castile soap
Mix ingredients together. Apply to face and neck and massage into skin for at least 30 seconds, allowing the cleanser to loosen dirt and debris. Rinse face with warm water.
Shirley! Thanks! I’m glad to know you like oil cleansing-I’ve got to get my act together and get started already! Thanks for leaving the post from camp wander-I didn’t realize she had one!
I made this for the second time today and it is amazing! It smells great and leaves my skin feeling silky soft. Instead of shaking I use the wish attachment on my immersion blender, much easier,IMO, then shaking! I use it as a body lotion and also on my face. Thanks Jenni!
Michelle! I’m glad you like it! Thanks!!
Hi,
I’m excited to give this a try. Just wondering if you have an estimate of shelf life?
Jackie-the shelf life varies depending on what type of container you use. If you are using a bottle with a cap or pump I have gotten 6 mos. out of some of mine. Citric Acid and NeoDefend must be used though. I like to say around 3 mos. at the least though, just to avoid disappointment! Thanks!
HI Jenni
Could you let the mixtures completely cool then blend? Then both would b the same temps for sure.
Thanks
Loretta-I haven’t tried it but I have always read that the temps have to be between 120-135 for them to properly blend. Plus, the oil mixture would harden due to the wax. It’s definitely worth an experiment though!
It does work when it’s cooled down! That’s how I always do it, because I just can’t get it emulsify when it’s warm ^^” So basically you put the oils and the wax and let them melt. Then just give it a good stir and leave it at room temperature or outside (though not when it’s freezing =)). Mix the water base and add it to the cooled oil base and use a hand mixer or something like that^^ I start with low speed and work my way up to max speed.
I usually add my oils when the oil base start to harden and there is still a liquid phase or just add them when you whip it, that should work too. =)
And it works with plain beewax ^^
Chris-Thanks for sharing!! I’m excited to try this!
The other lotion you have listed (lavender geranium) doesn’t use the neodefend, why is that?
Hi Nikky-I actually just added NeoDefend to this moisturizer. I have been experimenting lately with my lotions, trying to find how to ensure my recipes are safe and free from mold and bacteria but still keep them organic and as natural as possible. Since the lavender geranium recipe is on Primally Inspired I need to contact her so she can change the recipe.
In case you have made the lotion and are concerned, I have done some bacteria testing on my lotions with no preservative. Because I add citric acid which lowers the pH quite a bit (bacteria has a hard time growing in lower pH) and because I use so many antibacterial essential oils I did not have much bacteria/mold growth.
I will be contacting Primally Inspired today to change those lotion recipes to include NeoDefend and lower citric acid-NeoDefend is certified organic, non GMO and very gentle to the skin. I’m satisfied that it is acceptable in natural recipes.
Thanks for noticing! Let me know if you have any other questions!
Jenni,
Love to see you making a new moisturizer and have managed to get your hands on the NeoDefend! Lavender is such a great EO…good for all that ails you! And you have some great ingredients in this. Macadamia oil is a bit drier so will counter the greasy feel of the Shea, and coconut oil helps everything penetrate! One thing I would mention that might not be clear with NeoDefend…in the absence of any alkaline substances, NeoDefend itself is acidic and will lower the pH of your lotion a bit. Oils and E-wax have no pH value, water is neutral (7), and I’m not sure about the Lavender, but there isn’t that much of it, so it might not have much effect either way…you might be able to leave out the citric acid is what I’m getting at. It doesn’t take much to lower the pH and with both (I’m not sure, you’d have to test it) your lotion might get quite a little too acidic, which *could* (maybe) be irritating to very sensitive skin. I doubt it is a problem, but it could at least simplify things to not need one ingredient. The pump idea is excellent for avoiding contamination too. One more little tip which not only helps prevent stuff growing in your product, but also helps with your emulsion, is you should heat both the oil and water phase to 70C (160F) and hold them between 70C and 80C (160F-175F) for 20 min. This helps kill contaminants and makes sure your ingredients are fully melted or homogenized and at the right temp. I usually try to use the same water bath to heat the two phases to reduce the guesswork. Your lotion looks so pretty, and I bet it smells divine! Let me know when you’re feeling adventurous and want to try out some botanical extracts or clays and I will send you some recipes to share :).
Paige-Thanks so much! I did not know that NeoDefend lowers pH-I knew it only worked within a lower range. Today I was actually going to try a lotion with no citric acid and see where the pH is at. With the citric acid it’s at a 3.5. I’d much rather hit somewhere in the 5’s. Thanks so much for commenting-you really sent me on a journey with getting these formulations correct-I’ve learned a lot since your first comment!!
One question-If you hold your mixtures at a temp. of 160-175F, will that kill the effectiveness of the carrier oils and butters? I know essential oils will lose their potency with too much heat. I just figured carrier oils were similar.
I am for sure interested in botanical extract and clays! I have french green clay but only use it as a mask.
Thanks so much Paige!!
Jenni,
I know what you mean! Once I started looking into formulating, I realized there was soooooo much information to incorporate! I am going home for a visit today and have made up a whole bunch of thick, rich body butters and emulsified scrubs to give to friends..squeeee! I just love making this stuff.
Most oils are tougher than you think especially if you keep the temp below 175F. Kukui and Evening Primrose are a couple that I can think of off the top of my head that maybe need a bit of coddling, but I usually just add them after the rest of the phase has reached 160F just so they don’t spend as much time heating up. Then, once you make your emulsion, which you should find comes together more easily with the heating and holding, you let it cool to below 113F and add in your cool-down phase with the EOs , extracts, vit E, and cosmeceuticals that are more heat sensitive. It’s a good idea to add some good quality vit E to your carrier oils as soon as you open them which will protect them somewhat from heat and light. Ooh, and another antioxidant you might like in the mix is rosemary oleoresin extract (ROE). It can work synergistically with vit E, reducing the total amount you need of each. It has a distinct, herbaceous rosemary scent, but you use so little it doesn’t really scent the recipe. Actually, I find I rather like it. Check out Point of Interest and do a search for beginner lotion making and Susan has great directions for ppl just starting out that will tell you what to put in what phase. She also has info about almost any ingredient you might want to consider (including all kinds of great oils and butters, and EcoCert emulsifiers that you might want to try once you’ve had some more practice). The first things you will want to consider adding to your recipe are humectants like glycerin or raw honey, and maybe something like aloe gel. You might want to think about making a small investment in a gram scale as recipes tend to be given, and work best, when measured by weight, rather than volume. They aren’t that expensive. You can probably get one on Amazon for $10-$15 and then, if you move on to adding cosmeceuticals that you add in tiny amounts, you can get a milligram scale for $20 or so. And definitely have a good thermometer or two. Making this stuff gets sooooooo addictive!
Clays are great…they add a nice feel and a touch of color. You just need a teeny bit. I like rose clay in particular as it is for dry and/or sensitive skin. I love love love extracts! I gave myself a nasty scald the other day and made myself a burn lotion with calendula and chamomile extract and geranium hydrosol (you can use hydrosols in place of some, or all, of the water in your recipe!).
Anywho, baby steps! It can be a bit overwhelming once you start down this road, but it’s sooo much fun!
I’m getting ready to fly home but will put together a couple of recipes for you to try out if you want. A face moisturizer and a body butter…and maybe an emulsified scrub so you can make a matched set! Maybe tell me what skin type you have and what concerns you want to address (like acne or redness or anti-aging etc.). Once you make it up, and make it your own, feel free to share it…and I want to know how it turns out :).
Hi Paige , I was wondering if you had an site yourself that you sell your products on? Also do you help other beginners with lotion making? I am very much into butter making but no one wants to rub on grease all the time lol so lotion making it is!
Thanks for getting back to me Jenni. I don’t have any Neodefend, but I do have citric acid. Can I just leave the Neodefend out and use the citric acid? I don’t see this lotion sitting very long as I moisturize myself and my son am and pm.
Thanks
Nikky-I would go ahead and leave it out and use your citric acid. Use it quick and keep it in the fridge. The essential oils will help too! Thanks!
Can I use grapefruit extract instead of neodefend?
Nanci-Grapefruit Seed Extract is technically not a preservative. I have not worked with it at all so I don’t know how well it works. Many people that are looking to go totally natural do use it as a preservative though. The problem is, is that you don’t quite know if you’ve got bacteria. Just because it looks good and smells good doesn’t mean it’s not full of bacteria. Hope this helps!
How do you know if your lotion has gone bad? Also we could use which ever oils we choose correct? I am making a lotion for my son, and want to let him pick his own scent.
Can you sub cocoa butter for Shea?
Nikky-Yes you can!
What would be a good substitute for macadamia nut oil? My husband has nut allergies, and has reacted to it in body creams before (his poor hands swelled up like he was wearing puffy gloves!) …just in case his skin is feeling dry and he grabs my cream!
Hi! Well, I use macadamia nut for it’s moisturizing abilities so other oils that are good for moisturizing would be olive oil and avocado oil. Almond oil is great but it’s another nut oil! I love using olive oil in recipes-I just love how the smell mixes with lavender essential oil-it’s a fun one to try!
I notice all the above posts were two years ago. Today Macadamia Nut oil is just not available and hasn’t been for months. Any ideas?
Author
Hi Jean! I responded in another post about this but just in case-Thanks for letting me know. I hadn’t bought this oil for a while so I didn’t know! THIS is an acceptable alternative.
Hello, I’m wondering what the benefit of using macadamia nut oil is compared apricot kernal oil or avocado oil?
Thanks so much. Excited to try your recipe. I’ve been looking for a more “lotion” feel instead of greasy feel.
Author
Lisa-I would use avocado oil because it’s a very moisturizing oil-a bit more then apricot kernal in my opinion.
Hi Jenni,
I’ve been making your DIY Anti Wrinkle Eye Stick for myself and my daughter for over a year now……we both use it all over our face and it’s Devine….so nourishing.
I would like to make your Creamy Body Moisturiser but cannot get Neo Defend in the UK. I wondered if you could recommend a UK equivalent.
Thanks a mil x
Author
Lesley-I’m so glad you like it! It’s one of my favorites! I’m not sure what is available in the UK so if I were you, I would google “organic preservatives” and see what you come up with. I like Optiphen Plus if you could find it. Thanks!!
Just want you to know, I’ve made a lot of lotions and add additional ingredients sometimes but this is always my go-to recipe for a great lotion! Thank you!
Hi jenni
I do diy too buh so confused about some of your blog in the sense that I add Cetyl alcohol and stearic acid into my oil and e wax.
Is there a way to make this smell like vanilla? I’ve made the lotion and it is AMAZING!!! I have a whipped body butter recipe that is made with coconut oil coco butter and shea butter and it smells amazing, can cocoa butter be used in this recipeto get a similar scent to the body butter? Noth My compares to the smooth texture of this lotion or how quickly it soaks into the skin. Thanks so much!
Author
Thanks so much Lindsay! There is actually a vanilla essential oil. Spark Naturals doesn’t carry it but I believe mine is from Eden’s Garden. I also suggest Plant Therapy too. They are both on Amazon. Hope this helps!
I have made this lotion according to your ingredients and instructions and it came out great! I loved seeing all that creamy white goodness that I had made myself! It took some patience though, as I had to keep checking the temperature of the two different batches. It is kind of messy, so I will have to experiment with ways to do the recipe so it’s a little less messy for me. I have only done this method with mayonnaise, including using the immersion blender. The immersion blender works perfectly for your lotion recipe and when I do mayonnaise. Such a simple but “revolutionary” method for doing emulsions. I have already given some of your lotion that I made to friends. I like to use it during the day when I want less of the greasy-ish effect of the salve-like balms and then use the non-emulsified bees wax/butter balms (or lotions) for the night, usually.
The NeoDefend link is no longer valid…do you purchase somewhere else now? Thanks for all your information!
Author
Tammy-Sorry about that-I just fixed it! Thanks for letting me know!
Do you refrigerate the jars with extra lotion you don’t need right the way?
Author
Lili-Yes, I do!! It helps to only store about 2 oz. on your counter and then store the rest in the fridge.